Holy smokes it's been awhile since I've written anything. We had some company from out of town and I had a few deadlines in school but even still, there was certainly time to write. This past weekend I finally got to brew (the weather is warming up!) the West Coast Brown Ale recipe from Brewing Classic Styles by Mike McDole, dubbed "Janet's Brown" in memory of Mike's late wife. This beer is technically a part of the American Brown Ale category though slightly out of style guidelines being ever so higher in bitterness and hops than prescribed. As with all things over the top hoppy, they get dubbed 'West Coast' varieties. The increased hops in this brew were actually something I was greatly looking forward to working with as I just purchased a new piece of equipment called the 'Hop Stopper' from The Electric Brewery's website. 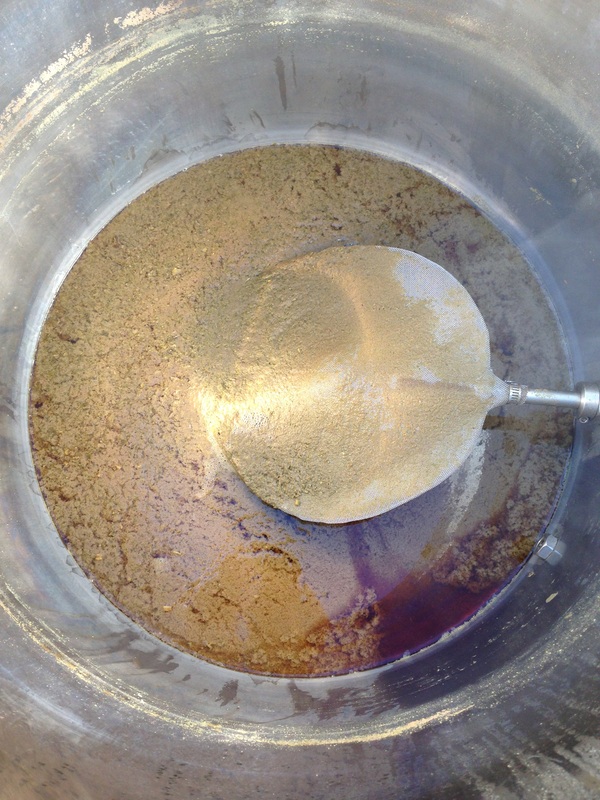 Hop Stopper having filtered out 6 ounces of hops from a 5 gallon batch of Janet's Brown Essentially this is a medium-sized saucer-shaped screen that is affixed over a dip tube which sucks the wort from the bottom of the kettle. I'm using a gravity feed right now and didn't have my kettle high enough to make things easy on myself, but as you can see even with a sub-optimal setup I only left about .25 to .5 gallons of liquid/hops behind. I just started using a convoluted wort chiller so the wort hadn't been chilled at this point. I would say virtually no hop matter got into the carboy. Overall I was really pleased with the performance of the hop stopper. For reference, this was approximately 6 ounces of hops in a 5 gallon batch.
Chill Mode Any brewer can tell you that beer yeast has a specific temperature range in which it can survive. More importantly, specific beer yeasts have very specific temperature ranges in which they can thrive. For most Ale yeasts (Lager being the other varietal), this temperature range is somewhere between 65 and 75 degrees Fahrenheit. This poses a dilemma for the brewer as the wort (unfermented beer) is fresh off a 60-90 minute boil prior to pitching the yeast, requiring some sort of heat exchange to get that wort down to pitching temps. If the batch is small enough, like those commonly brewed on the stove top, a nice ice bath does the trick well enough. But when a brewer steps up to 5, 10, and even 15 gallon batches, there's no easy way to ice bathe it. Brewers are then forced to resort to other types of chilling. Most commonly this is an immersion chiller, a counter-flow chiller, or a plate chiller. 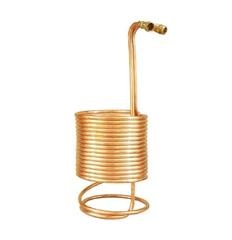 Immersion Chiller | 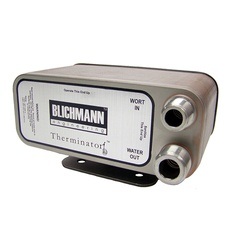 Plate Chiller | The pictures above are examples of the immersion and plate type chillers; these specific examples are from MoreBeer!, one of my favorite online vendors. I previously used an immersion chiller and it's nice because it's fairly easy to clean but it really does still take quite a bit of time to chill the wort down. The plate chiller is probably the most efficient way of chilling wort due to the large surface area to liquid ratio, but they can also be a little more intensive on the cleaning side of things. So that led me to the counter-flow chiller. I consider this method to be a compromise between both; fast chilling yet still relatively easy to clean. I have aspirations to build an all electric brewery (more on that later) for the home and so any purchases or projects I undertake I try to make sure it won't be wasted efforts if/when I migrate to my dream setup. With that in mind, I used the example provided over at The Electric Brewery for my wort chiller setup. 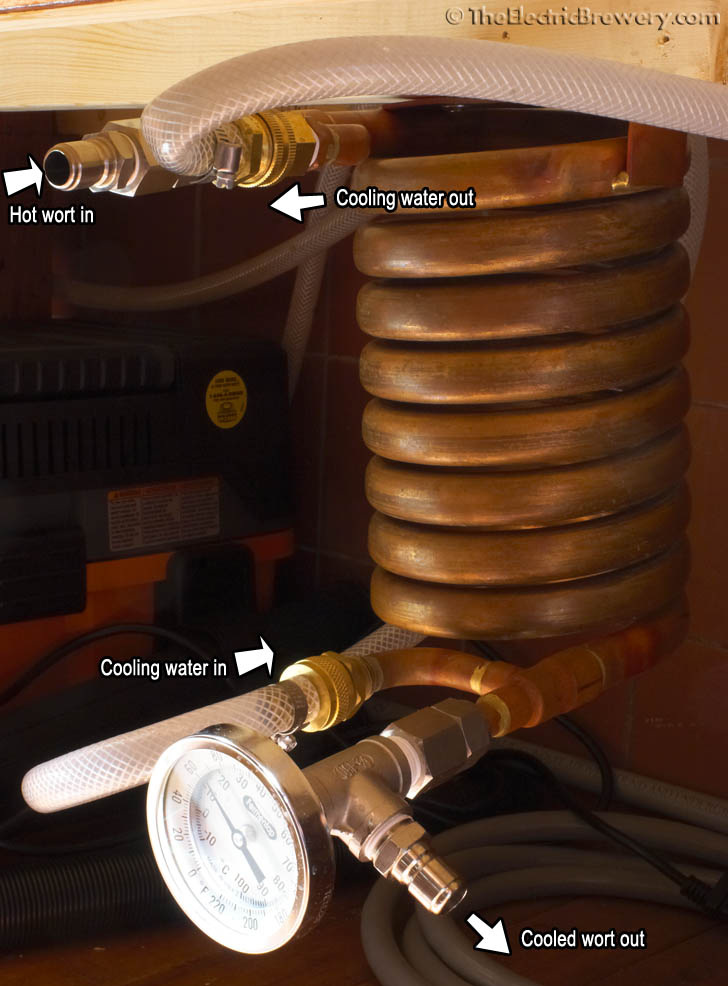 The Electric Brewery's Convoluted Counter-Flow Chiller setup and my inspiration I really love this design for a few reasons: 1) It's totally CIP (Clean In Place), 2) Instant temperature readings as the cooled wort flows out of the chiller, and 3) It just looks sexy! I can pretty much say that about all the things Kal did over at The Electric Brewery - it's a home brewer's dream!
Alright, enough chit-chat, on to my build!
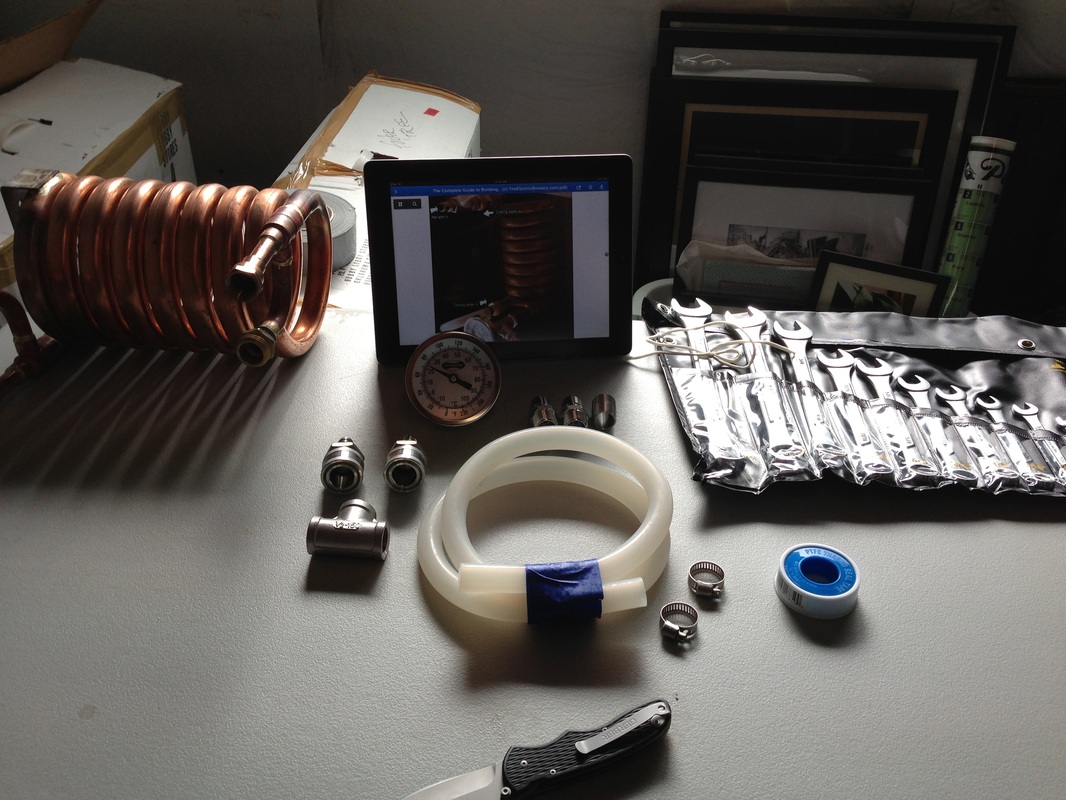 All the parts and tools laid out ready to go! Got my .PDF guide to building The Electric Brewery loaded up for reference. 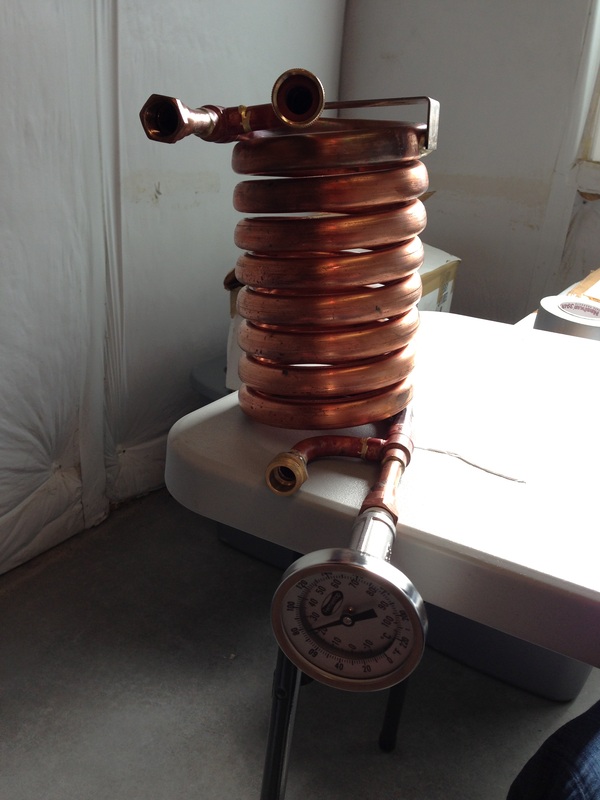 Chiller with the 'T' and thermometer attached The thermometer was a little crooked but after some heavy wrench work I got it to line up enough to satisfy my OCD. 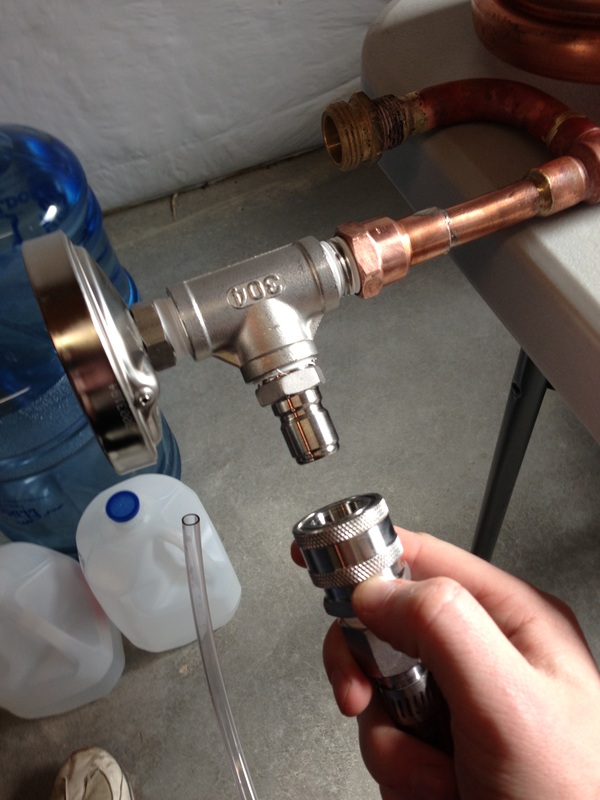 Cooled wort out section completed after getting the male stainless steel quick-disconnect attached. This image does a good job of showing you the benefits of these quick disconnect fittings. The male quick disconnect here is where the cooled wort will flow out of. In order to get the cooled wort into whatever fermentation vessel I am using I simply snap the female quick disconnect onto the male side and Boom!, off to the races. 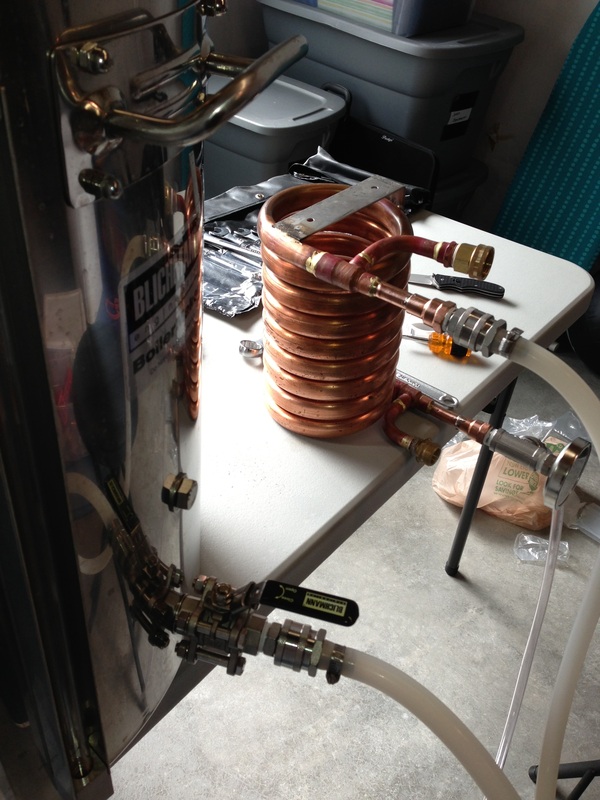 A mock-up of how the brew-day setup So there you have it! As you can see the hot wort will flow through the ball valve at the bottom of the kettle and into the food-grade high temperature silicone tubing (also affixed with quick-disconnects for ease of use!). It then enters the counter-flow chiller while cold water is being pumped in the reverse direction from the garden hose. As the wort flows out I read the temperature from the thermometer and open or close the ball valve to speed up or slow down the wort flow accordingly. The slower it goes the more heat exchange that occurs and the closer I can get it to ground water temperatures; super handy! This project was very simple and pretty fun. I'm really excited to have this setup and would highly recommend any home brewers out there to do something similar. If you like this build out you can find all the instructions and parts over at the glorious Electric Brewery site. 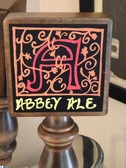 Abbey Ale tap handle What I'm Drinking:Homebrewed Belgian Abbey AleIsn't #SWMBO's artwork the bomb? She makes this look so good. Click the link to find more of her stuff. This kit was from Austin Homebrew Supply, one of my favorite places to order beer recipe kits. They literally have everything!Using a trappist ale yeast, this beer has clear banana and clove notes in the aroma, almost like banana bread. The color is a golden brown with subtle orange. This was the first beer I filtered so it's crystal clear - something I strive for in my beers. The carbonation isn't quite there yet but overall the flavor is very good. This beer isn't overly bitter but has some great spice notes from the trappist yeast. Cheers!
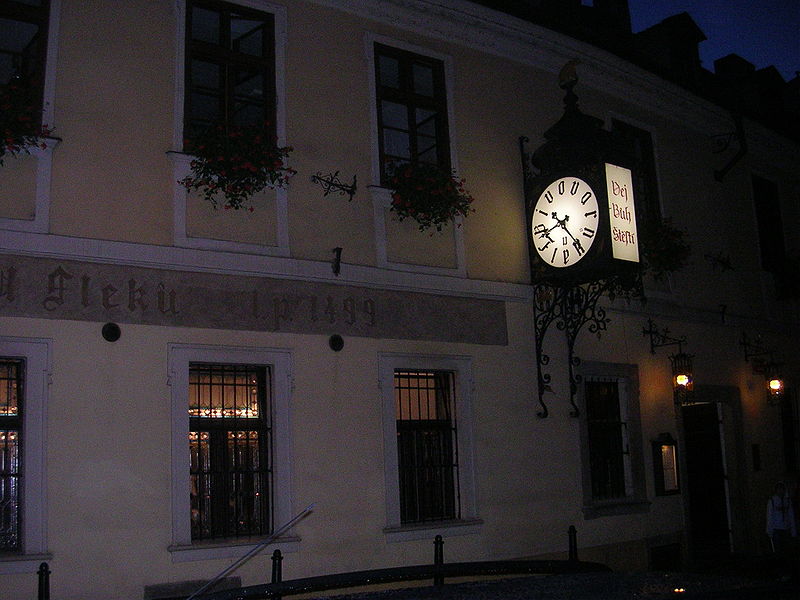
This Beer Tastes Old 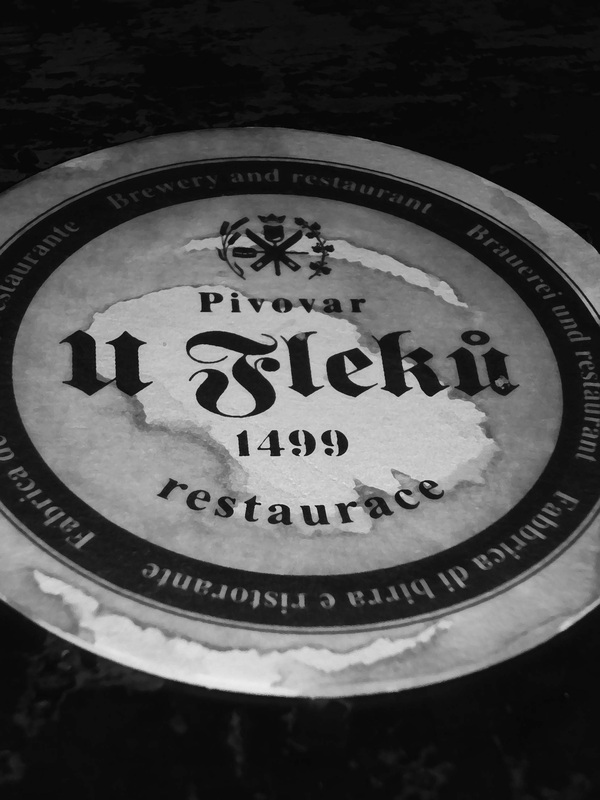 A battle-hardened (read: beer-stained) coaster from U Fleku, Prague's oldest brewery A couple years back, the wife and I traveled with some of our good friends to Europe. This might have actually been the catalyst to my beer obsession now that I think about it. Among other things on the itinerary, we visited the legendary Oktoberfest in Munich and then headed up to Prague where we found this lovely little brewery.
U Fleku was recommended to us by my wife's boss, whose wife was from the Czech Republic. I'm so pleased that we went and checked it out. U Fleku is accessed off a little side street and the outside is very unassuming. It's been in operation since...wait for it....1499! That's over 500 years old! Our country isn't as old as this beer...not even close.  Once inside we were assaulted with the quiet din of many a pint being shared and an especially rosy cheeked accordion player waltzing his happy ass around. Bench seating is the standard here with very few small tables lining the outside of the room. Not many foreigners were present and we felt it was quite an authentic Czech experience. The food was crazy good and was probably either a pork knuckle or some whole chicken roasted to divinity.
U Fleku serves only one kind of beer. It's a dark lager and I considered it to be the best beer of the trip; it far surpasses the famous Pilsner Urquell in my opinion.
Waiters didn't even ask you if you wanted a beer. We sat down and a gent came by with a tray loaded with mugs of beer and 3 got slammed down in front of us with much splashing (refer to my coaster). 3 tick marks were put on a piece of paper and off he went weaving among the polka band to other thirsty patrons. When your beer was almost gone another one was provided, a check mark was produced, and no words were exchanged. Beauty in simplicity?
 Happy ass accordion player If you find yourself in Prague you owe it to yourself to check out this brewery. It was absolutely one of the highlights of our trip and of all the modest amount of travel I have done it is still one of the most memorable nights I've had. The beer was delicious too!
Now to see if I can go get #SWMBO to take me out for fancy beer drinking....
Cheers!
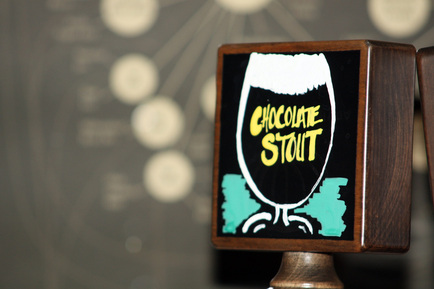 Awesome tap handle art work courtesy of #SWMBO as usual What I'm Drinking:Homebrewed Chocolate Stout ABV 5.2%
I found this recipe over at Homebrew Talk. It actually called for mint to be put in it. I decided at the last minute to forego that and I think it turned out pretty well. This beer is a dark, opaque brown with a moderate, but quickly dissipating light brown head. Chocolate aroma dominates. Bitterness and semi-sweetness from the chocolate complement each other well. This beer finishes semi-dry and with a significant cocoa taste. I'm warming up to this one...or maybe this one's warming me up.
I just went Pro...kinda... Today marks a significant event in my brewing life; I started an internship at a local brewery here in Colorado. I'm really excited because it's one of my favorite breweries in the area. It was by far my first choice and after waiting weeks with no reply I finally got a response last week and the interview process was basically "When do you want to work?"
We brewed a real basic beer today, one that many beer snobs might even turn their nose up at, but it was a great learning experience. I got to perform every step in the brewing process at least once and some of them twice. I think half of brewing is being able to wrap your head around plumping; you can't imagine the number of pipes/hoses/valves involved in the brewing process, even on a small scale!
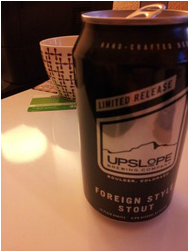 Upslope Foreign Style Stout What I'm Drinking:
Upslope (HINT) Foreign Style Stout
A limited release from Upslope. A wonderfully mild burnt taste; medium bitterness in the finish and smooth taste throughout. Really a great example of the style and one of my new favorites...period.
Sour Beer! I came across this interview of Lauren Salazar by a fella named Brandon over at Embrace The Funk. Lauren is the "Sensory Specialist" at New Belgium Brewing company and in charge of the blending of their sour beers. If you have ever toured the New Belgium Brewing Company and seen their barrel aging room you know what a tremendous job she is doing. They have so many barrels with so many beers at so many various stages of aging! 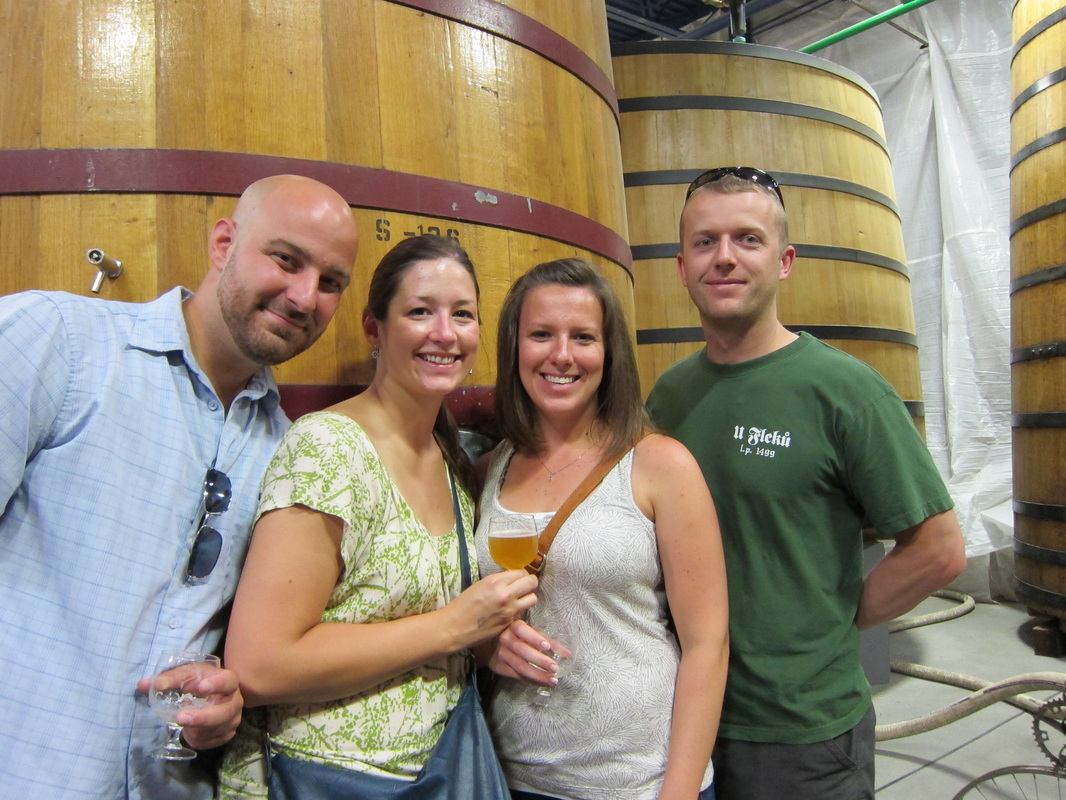 A picture from a tour in New Belgium's Barrel Aging Room What's that you say? You've never heard of sour beer? Well, my friends, let me enlighten you if I may. Sour beers are purposefully infected with bacteria that create a sour taste in the beer. Think granny smith apple sour not vinegar sour. These beers come in a wide range of sourness; all the way from mouth puckering tear-jerkers to subtle hints of sourness after careful blending.
Sours can come in many varieties, but typically you have two types: beers that are fermented with a yeast that gives off sour characteristics and beers that are introduced to bacteria post-fermentation. The former type of sour beer is fermented with brettanomyces and the second is innoculated with the bacteria lactobacillus or pediococcus. I find that I far prefer the tart sourness from the lactobacillus at this point in my love affair with sour beers.
The interview got my thirst up for my current favorite sour beer, New Belgium's La Folie. It just so happens that this beer was recently released so I scooted on over to the local Total Beverage to pick up a couple bombers of it. At $17 bucks for 22 oz it's by no means a cheap beer, but man oh man is it a great brew. This beer is best enjoyed at a warmer temperature so a glass that allows for maximal hand-to-beer contact is a must. 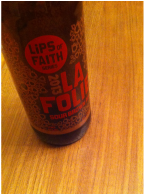 La Folie - 2013 What I'm Drinking:
New Belgium Brewing La Folie...Duh!!!
This beer is 100% sour. While it is blended with other sours at various stages in their aging, there are no non-sours blended in. The result is an intensely tart nose that gives way to some more subtle fruit and spice upon agitation. La Folie is a brown ale at its base and as such is a deep red color nearing opaqueness. Smooth through the middle with reserved tartness, La Folie finishes very mouth-puckering with granny smith apple or pear flavors. Not for the faint of heart but very good!
A brew for every occasion When someone tells me that they don't like beer my first thought is that they just haven't found the right beer to love them. They've probably been seeing the wrong beer, the beer that doesn't appreciate them for who they truly are, the beer that won't hold their hair back when they get sick (see, I'm purposefully referencing women because usually its my lady pals that claim to not like da beers).
There are so many styles of beer that I posit one surely suits your palette. Crisp, clean, and malty? We got that. Big, roasted, chocolaty? Mmmhmm. Pumpkin pie spices with a beautiful amber hue. Check. So much hop flavor your pores secret hop resins? Double-IPA-check. Want your beer to taste like a wine? Get out.
Sike...we can even do that one too.
My point is that saying you don't like beer in a sweeping declaration (#SWMBO) is foolishness. There, I said it. Fools! I implore you to step outside of your box! There exists a world of wonderful flavors that put the varietals of wines to shame in my not-so-humble opinion.
So the next time you're sipping your Merlot or your Riesling or your Cabernet and thinking to yourself how they haven't told you they loved you lately, I encourage you to visit your local specialty/craft brew store and take a chance on that geeky looking beer waiting to give its love to you. Let it in to your heart; it has so much to give. 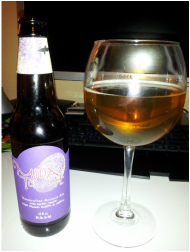 Dogfish Head Midas Touch What I'm Drinking:Dogfish Head Midas TouchThis couldn't be more on topic if I tried. It's almost like I based this post on what I was drinking. The ingredients of this fine brew include barley, honey, white muscat grapes, and saffron. Now tell me that isn't intriguing?! The wine character of this beer really can't be understated. The white grapes lend a very white wine feel to the beer with the barley adding a considerable body. The honey and saffron nicely spice the beer up and the combination of flavors is really thought-provoking. The flavors are dense but balanced. Big grape flavors in the middle give way to a saffron spice and finish with a dry white wine burn. You'll notice that I'm drinking this beer out of what appears to be a red wine glass. Well...it is. You heard me. I'm drinking my beer out of a wine glass. Why you ask? For the same reasons you drink wine out of a wine glass of course. The large bowl traps aromas and provides great surface area for the warmth of my hands to warm the beer. Yep, warm beer is desirable. You see, the mainstream lagers like Bud Light are meant to be served as cold as possible to mask any off flavors in the beer. As a beer warms certain flavor components become more pronounced and this is precisely what we want from our beautifully brewed craft beers. Frosted pint glass? Take a hike. I know this is getting lengthy, but I have to add some sweet trivia about this beer. Sam Calagione, founder of Dogfish Head, based this beer on an ancient recipe discovered in King Midas' tome. Evidence suggested a brew was made with grapes, thyme, barley, and honey for the King's funeral. Designed for an event celebrating King Midas at the University of Pennsylvania, Sam and his crew recreated this incredible 'beer-wine-mead' based on that recipe. You can read more about this in Sam's book " Brewing Up A Business."
What's a yeast starter?
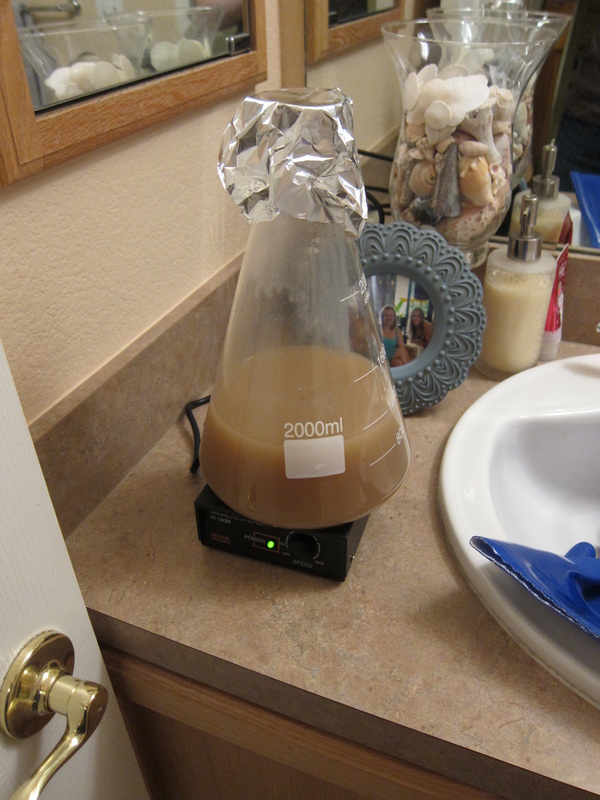
^ That's a yeast starter
Time to get a little geeky. Most homebrewers start out with a pretty bare bones stove-top setup. We ferment our beer in a closet or garage or basement or some similar environment. We just dump a vial or packet of yeast into our beer and forget about it for a week or two until it's time to bottle. This goes on for a few batches until the bug either sets in for good or you decide the hobby just isn't for you.
If you're like me the bug set in and in a big way. Your significant other starts worrying about you; interventions are had. Nothing can sway your interest however, you're hooked. You start researching ways to take your brewing to the next level. You hear about things like fermentation control, proper pitch rates, kegging, and on and on ad infinitum.
Today I want to talk about one of these Performance Enhancing Doohickies (PEDs...all the rage right now), the Yeast Starter.
The basic idea behind a yeast starter is to get your yeast up to proper pitching rates, which are largely determined by the amount of fermentable sugars in your brew, and to ensure they are active and ready to rock.
When yeast reproduce they can create esters as a by-product. Esters typically emerge as a fruity flavor to beer. Lots of times this can be a banana-esque taste to beers, which is sometimes a defining characteristic of a beer style but not always desirable in others. A yeast starter ensures that you're pitching at close to optimal rates, reducing the need for yeast to reproduce, and thus reducing ester production.
How to make a yeast starter We make a yeast starter by combining some Dry Malt Extract (DME) with water, boiling it for 10-15 minutes, chilling it to proper pitching temperatures, and then adding our yeast! So in other words, a mini-brew!
Typical recommendations for a yeast starter suggest a Original Gravity (O.G.) of 1.040 is desirable. This gravity can be achieved with a DME:Water ratio of 1gm per 10 mL. I typically use very hot water from my tap, mix in the DME, and then funnel it into an Erlenmeyer flask to go on the stove top. You want to be sure that you either have a gas burner or a glass top stove as the direct heat from electric coils can cause borosilicate glass to crack because of uneven heat distributions.
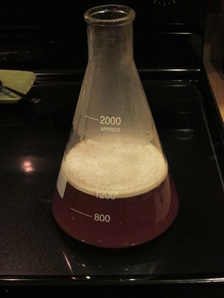
A 2 liter Erlenmeyer flask
| Apply heat from the burner and wait for that bad boy to start boiling. When boiling a yeast starter in a flask like the one pictured to the right, one must be very careful not to have a boil-over and incur the wrath of SWMBO. I personally am experimenting with these anti-foaming drops called FermCapS. They work very well and the only complaints I have seen is from folks who are wary about putting silicone in their beer. I only use a very small amount (2-3 drops) in my yeast starter so by the time it gets to my beer glass I'm fairly confident the parts per million (ppm) are well below the FDA recommendations. | Once the starter gets to boiling I turn the heat down and let it go for about 10-15 minutes to kill off any bacteria (our little yeast friends need a clean environment to get down in).
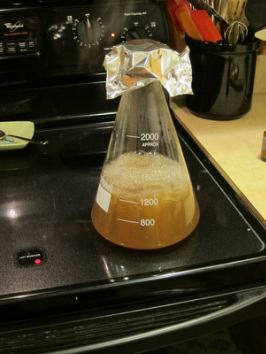
Boiling away!
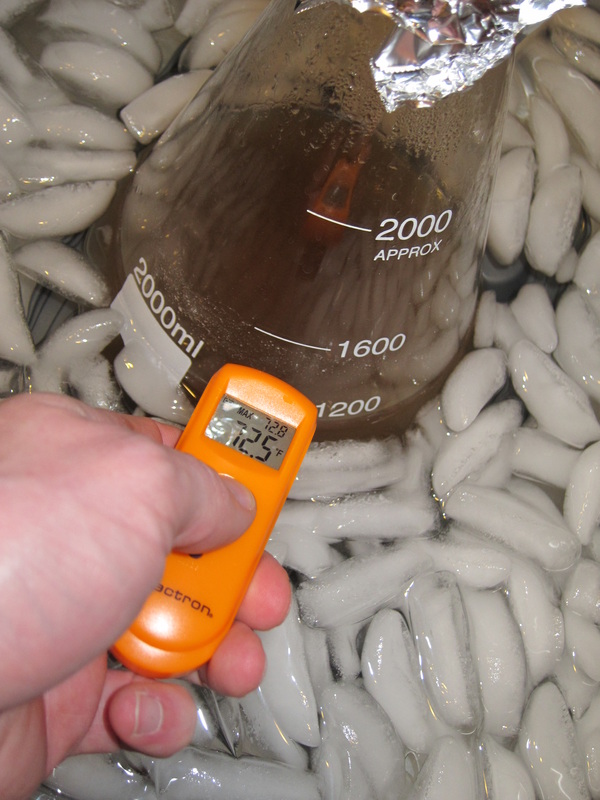
After 10-15 minutes has elapsed I remove the flask from the heat source and let it drop in temperature a bit. Glass is most susceptible to breaking during high temperature swings. Even though this is borosilicate and supposed to be immune to said swings I just take this little precaution. After another 2-3 minutes of it adjusting temperature I drop it into an ice bath in the sink, being careful to make sure that the ice water only touches the parts of the flask that are in contact with the wort so as to, again, create a gradual temperature change. You can move the water around the flask to speed up the heat transfer, but it doesn't take that long since it's such a small volume.
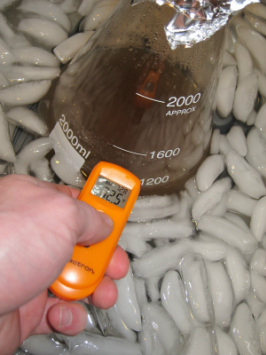
Chill mode
After the wort has cooled to an acceptable pitch rate somewhere between 70 and 80 degrees Fahrenheit, I remove it from the ice bath and dump my liquid yeast vial in. The next step will depend on your equipment and time availability. The most preferential and easiest way to create a great starter is with a stir plate. This is a plate with a big magnet inside that spins around which in turn spins a tiny stirring rod inside the flask to create a small whirlpool in the wort facilitating superb oxygen exchange (vital to yeast reproduction). The next best would be to just sit the yeast starter on a counter somewhere and give it a good twirl every time you walk past it. Finally, the poor/lazy man's approach is to just set it and forget it. Most all yeast production will have finished by 18 hours with it virtually stopping at 36. I tend to let mine go for about 24 hours or so.
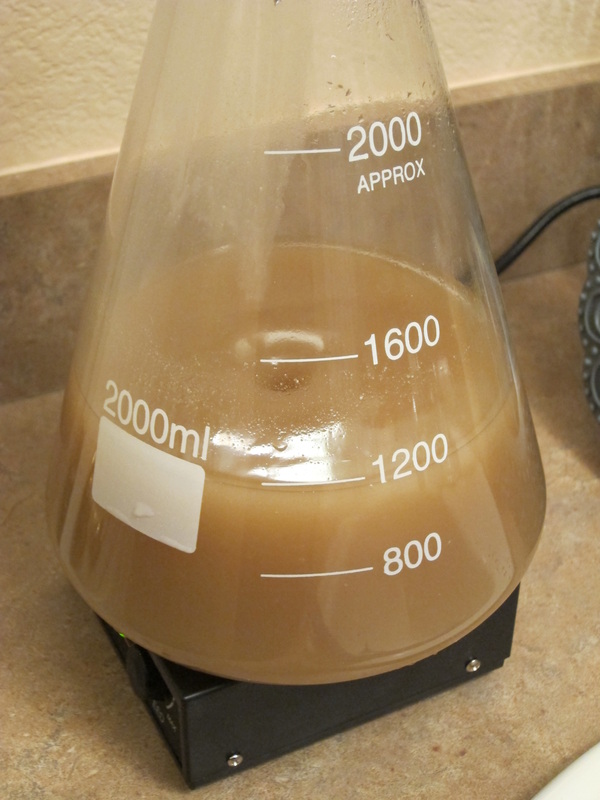
Reproducing is fun. Reproducing in a whirlpool is awesome!
| The last step is pitching your masterfully created yeast starter into your beer. There are two basic methods for this. The first is to stick the starter in the fridge for a day or two and allow the yeast to settle to the bottom. You can then slowly and gently decant the liquid off and then pitch the remaining slurry (just like one big White Labs vial). Or, if you have a relatively small starter like the one pictured here, you could just pitch the whole thing into your beer without fear of impacting the flavors terribly. | Making a yeast starter is really very easy. It just requires a little more forethought and a small increase in equipment (and combined with every other small increase in equipment for brewing results in having to buy a new home!). This is one of the best things a homebrewer can do to step up his or her beer quality tremendously and I highly recommend one be used anytime you're brewing anything over 1.050 O.G. I use Jamil Zainasheff's yeast calculator as I find it very easy to use and Jamil is a yeast guru. Post any questions to comments, cheers! 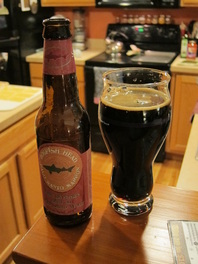 Dogfish Head Palo Santo Marron What I'm Drinking:
Dogfish Head Palo Santo Marron
This beer is unapologetic. At a whopping 12% ABV it smells like alcohol. Stylistically they allude to it being a brown ale aged on Palo Santo wood but to me it drinks like an Imperial Russian Stout in a lot of ways. I get a lot of raisin and plum flavor coming through. This is a big bodied beer with a significant alcohol burn (for a beer) and begs to be sipped in front of the fire...while smoking a pipe...and thinking grand thoughts...
Dogfish Head's slogan is "Off-centered beers for off-centered people" and this one fits the bill through and through.
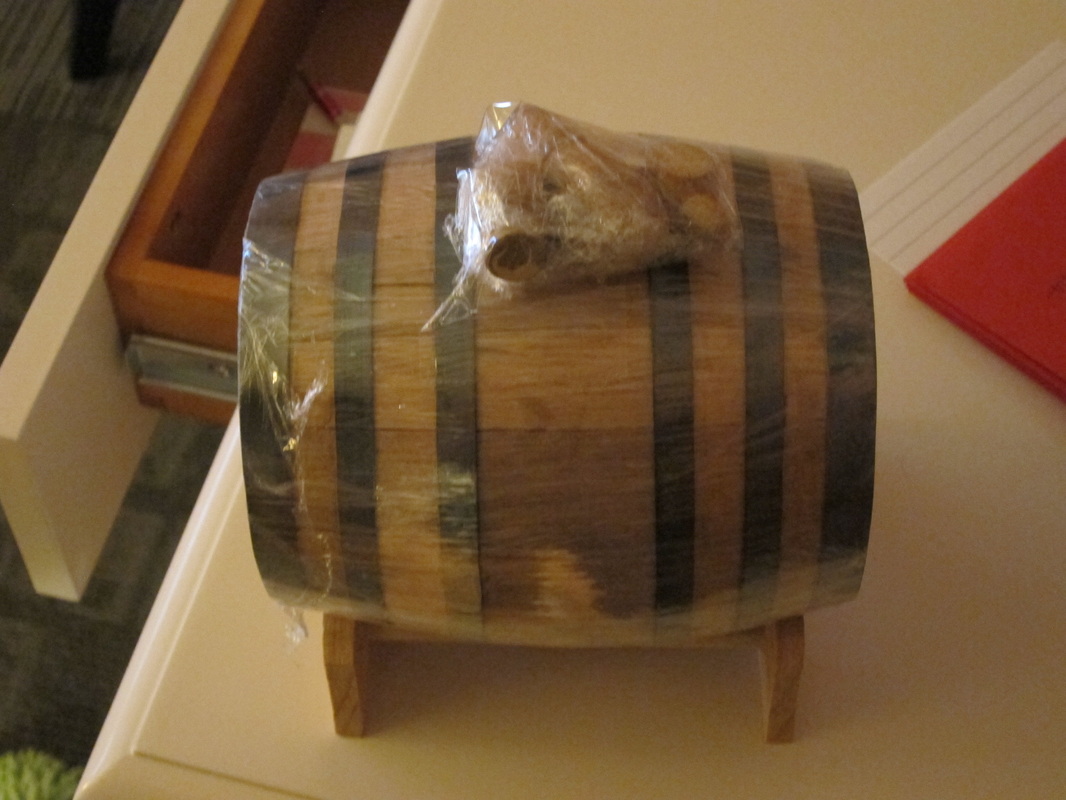
That, my friends, is one of the coolest Christmas gifts I've ever received. It's a 1 liter American Oak barrel from Oak Barrels, Ltd. I almost put some Scotch in there in my haste to start using it but the hombrewer in me won out and I have a Belgian Dubbel planned for it. It's going to be a clone of New Belgium's Abbey Ale (SWMBO's favorite). I've never aged anything in oak before and I'm trying to think through the whole process. This will be a slight challenge because 1 liter is roughly 1/20th the size of a standard homebrew batch. This means that I will have to put the 19/20ths I'm not using in another storage vessel and periodically use that to top up the oak barrel. I've read about oak aging beer a lot and there really is something magical about it. They even call the beer lost due to evaporation the '"angels' share." I don't know about you, but that's poetic to me. Because this barrel is so small there is going to be a much greater liquid to surface area ratio (higher percentage of the beer touching wood compared to a HUGE barrel). This means that the oak flavors will be imparted much more quickly than if a larger barrel were to be used. Additionally, if the beer sits in the barrel for more than 3 weeks or so, I might have to actually add more yeast to it before bottle conditioning. The complexity doesn't even end there, however. Depending on the flavor profile of the beer coming out of the barrel I might have to actually blend it back in with some of the non-oak-aged beer to get the right balance of flavor lest it be too oaky. I'll have to find a nice big 750 mL wine bottle or two to bottle this up. Maybe that should be the plan? Blend the 1 liter of aged beer with about .5 liters of non-oak-aged beer and then fill up two 750 mL bottles. Hussey Homebrew Private Reserve anyone? I've got a slam dunk of a Pumpkin Ale bottled up off the keg and am debating on whom to send them too. I have 5 in reserve because I think I might actually enter it into competition for the National Homebrewers' Conference. Keep an eye on your front porch and maybe you'll be getting some Pumpkin Ale!
Last year, as we were acclimating to US life again, I caught wind of this awesome beer and food pairing event in D.C. We happened to be traveling to D.C. for my cousin's graduation party the following weekend so I was trying to figure out clever ways to stretch the trip out to attend both. Alas the timing was off as I had discovered the event too late. Turns out that event was SAVOR and is said to be fantastic. This year SAVOR is heading to New York City. It happens to line up with other trips to that general region we are planning so I'm back to scheming. This time I may have enough of a head start given that they just announced the breweries who are attending. This event actually has breweries competing for the chance to pour through a lottery system. This does happen to be just two weeks before the National Homebrewers' Conference which I also have my eyes on. I'm not sure SWMBO will authorize all this travel for beer-related purposes... Information about SAVOR can be found at the 2013 SAVOR Website.I've only attended two beer festivals in the US. The first was the Columbus Beer Fest and the second was the Great American Beer Festival in Denver, CO. The former had a decent offering of breweries but was in a tremendously over-sized venue which left it feeling kind of warehouse-ish while the latter was, despite its large size, PACKED. SAVOR looks to be a more upscale and refined event which probably has its pros and cons. I tend to be a deep thinker where beer is concerned so I can appreciate the sophistication that food pairings brings to the craft beer industry.  What I'm Drinking:
Homebrewed Greenbelt Pale Ale
Dense head with tight lacing, citrus and floral aromas, moderately high hop bitterness.
I've decided to blog about beer. This decision is largely borne of my need to talk to someone other than myself about brewing; I'm starting to get weird looks from strangers.
While living in Kuwait I was introduced to the joys of homebrewing. I consider this ironic given the illegality of alcohol there. Amplifying the irony is that we had diplomatic privileges and could very well buy professionally crafted beer yet still decided to drink the swill we were making on our stove tops.
Sometime before serving in Kuwait I knew that I wanted more out of my beer drinking than the 'lights' had to offer me. Don't get me wrong, I won't kick a Bud Light out of bed for eating crackers if it's the only thing available to me, but I far prefer some more flavor to my beer. My first love affair would probably be Sam Adams' Boston Lager. It's still a go-to beer selection when nothing else is appealing to me.
Since being introduced to brewing I've fallen deeper and deeper into it. I've built a kegerator, purchased a 20 gallon Blichmann Boilermaker pot, and have plans in the works to build an all-electric brewing setup. Yea, it's an obsession. I've also developed an appreciation for the commercial brewing industry and enjoy following the goings-on within it.
I haven't 100% settled on the design of this blog so expect tumult for the next few weeks/years while I figure it out (read: wait for my very talented wife to tell me what looks best).
 What I'm Drinking:
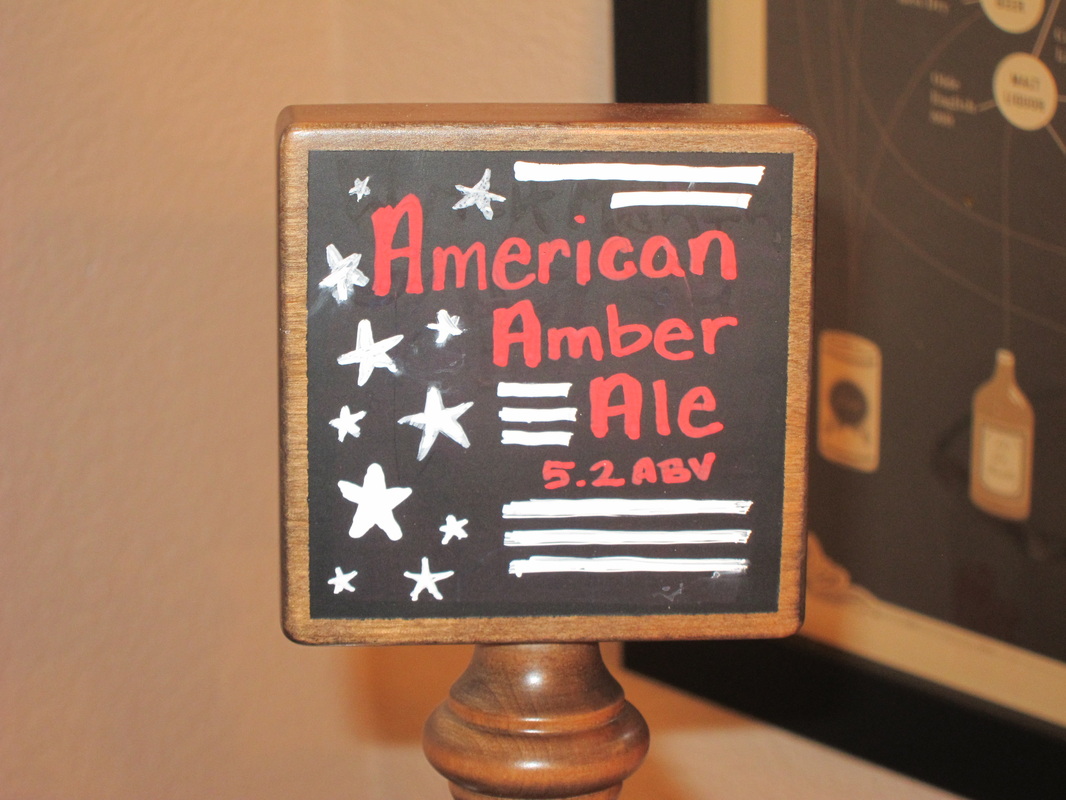
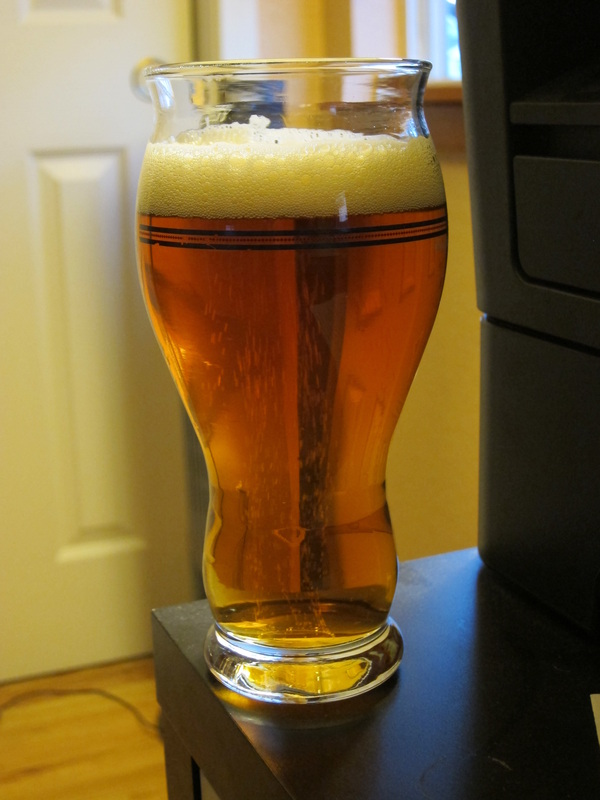
Homebrewed American Amber Ale
Sweet aroma, clear copper coloring, medium-bodied with caramel notes and a slight bitterness. Flavors linger on the tongue beckoning you to take another sip.
|


 RSS Feed